All guides
Add your team
Give each person on your team their own login, choose which clients they can work on, and have their posts wait for your approval before anything goes out.
Before you start
- ✓You are the workspace owner (only owners can manage the team)
- ✓Your clients added under Brands (see Add your business)
1. Your team page
Open Team in the menu. Everyone who can log in to your workspace is listed here, you included.
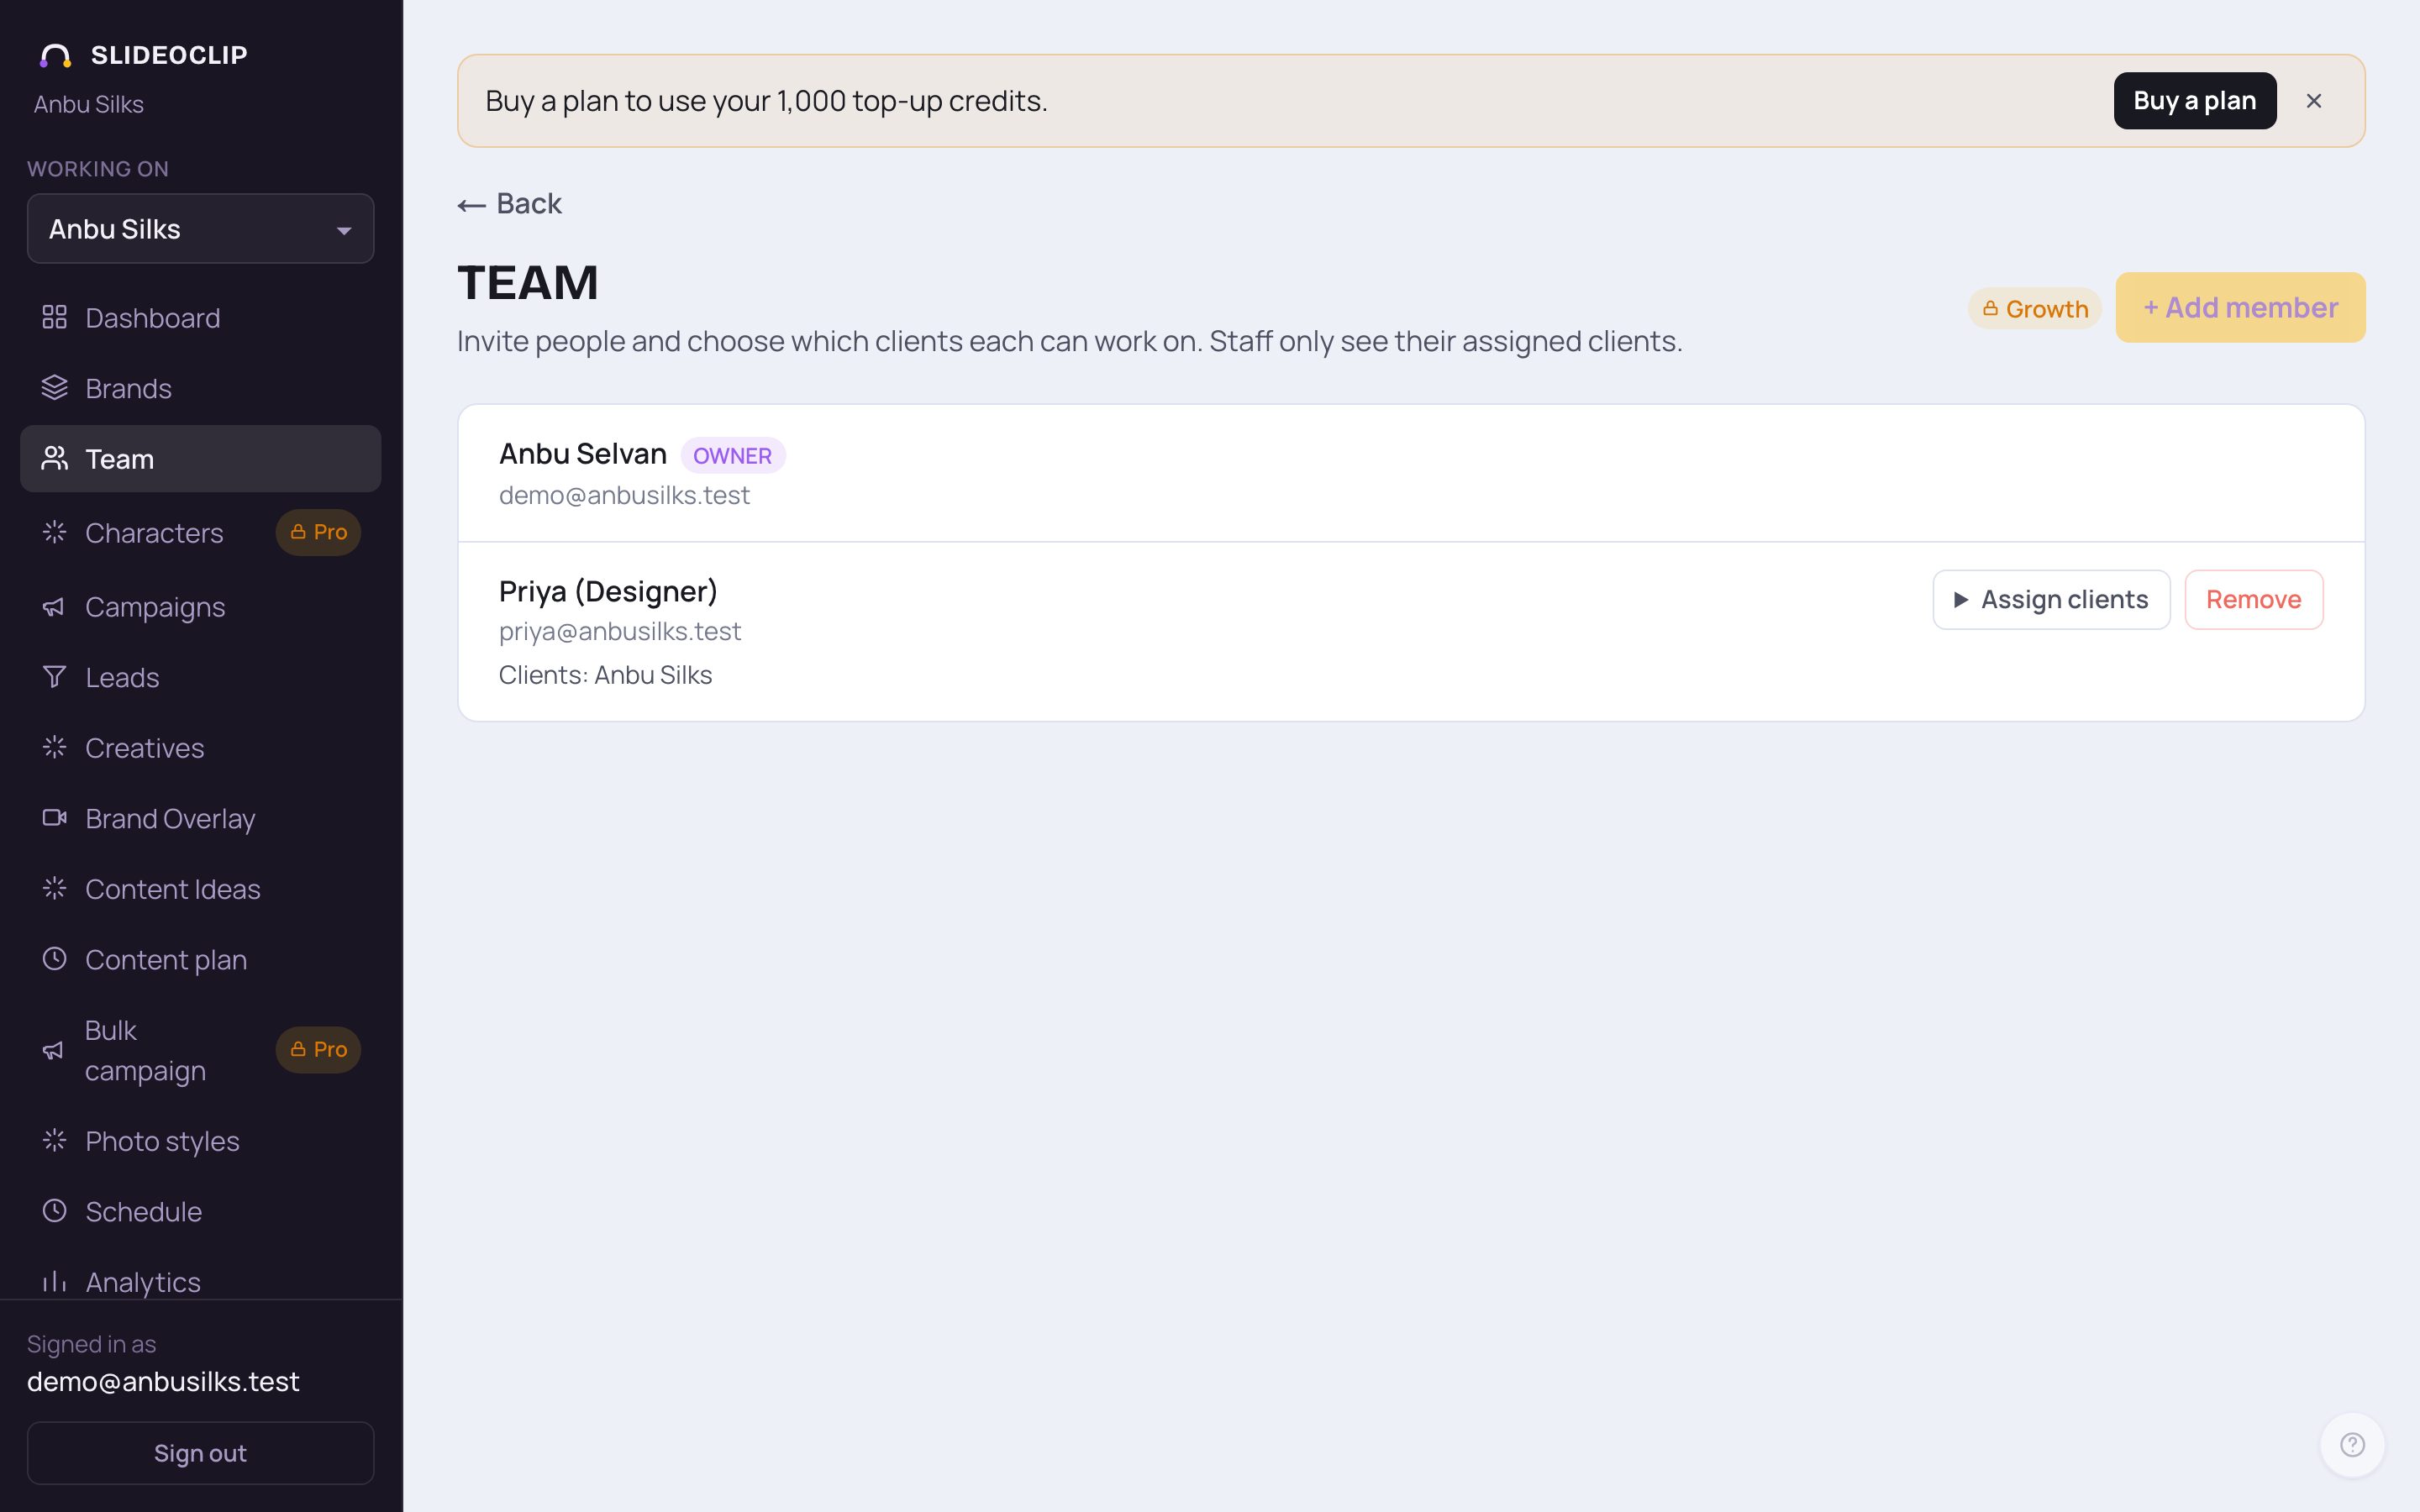
- 1Tap Team in the menu.
- 2Each person shows their name and login email. Owners have an Owner label.
- 3For staff, Clients: shows which clients they can work on. All clients (in yellow) means they can see every client.
- 4Tap + Add member to add someone.
💡 How many people can log in depends on your plan, and you count as one. When your plan is full, + Add member is greyed out and a small lock with a plan name appears beside it; tap the lock to see the plans.
2. Add a team member
You create the login yourself and pass it on. There is no invitation email, so tell the person their email and the first password yourself, for example on WhatsApp. The box that opens depends on your plan having room for another person, so it is described here in words.
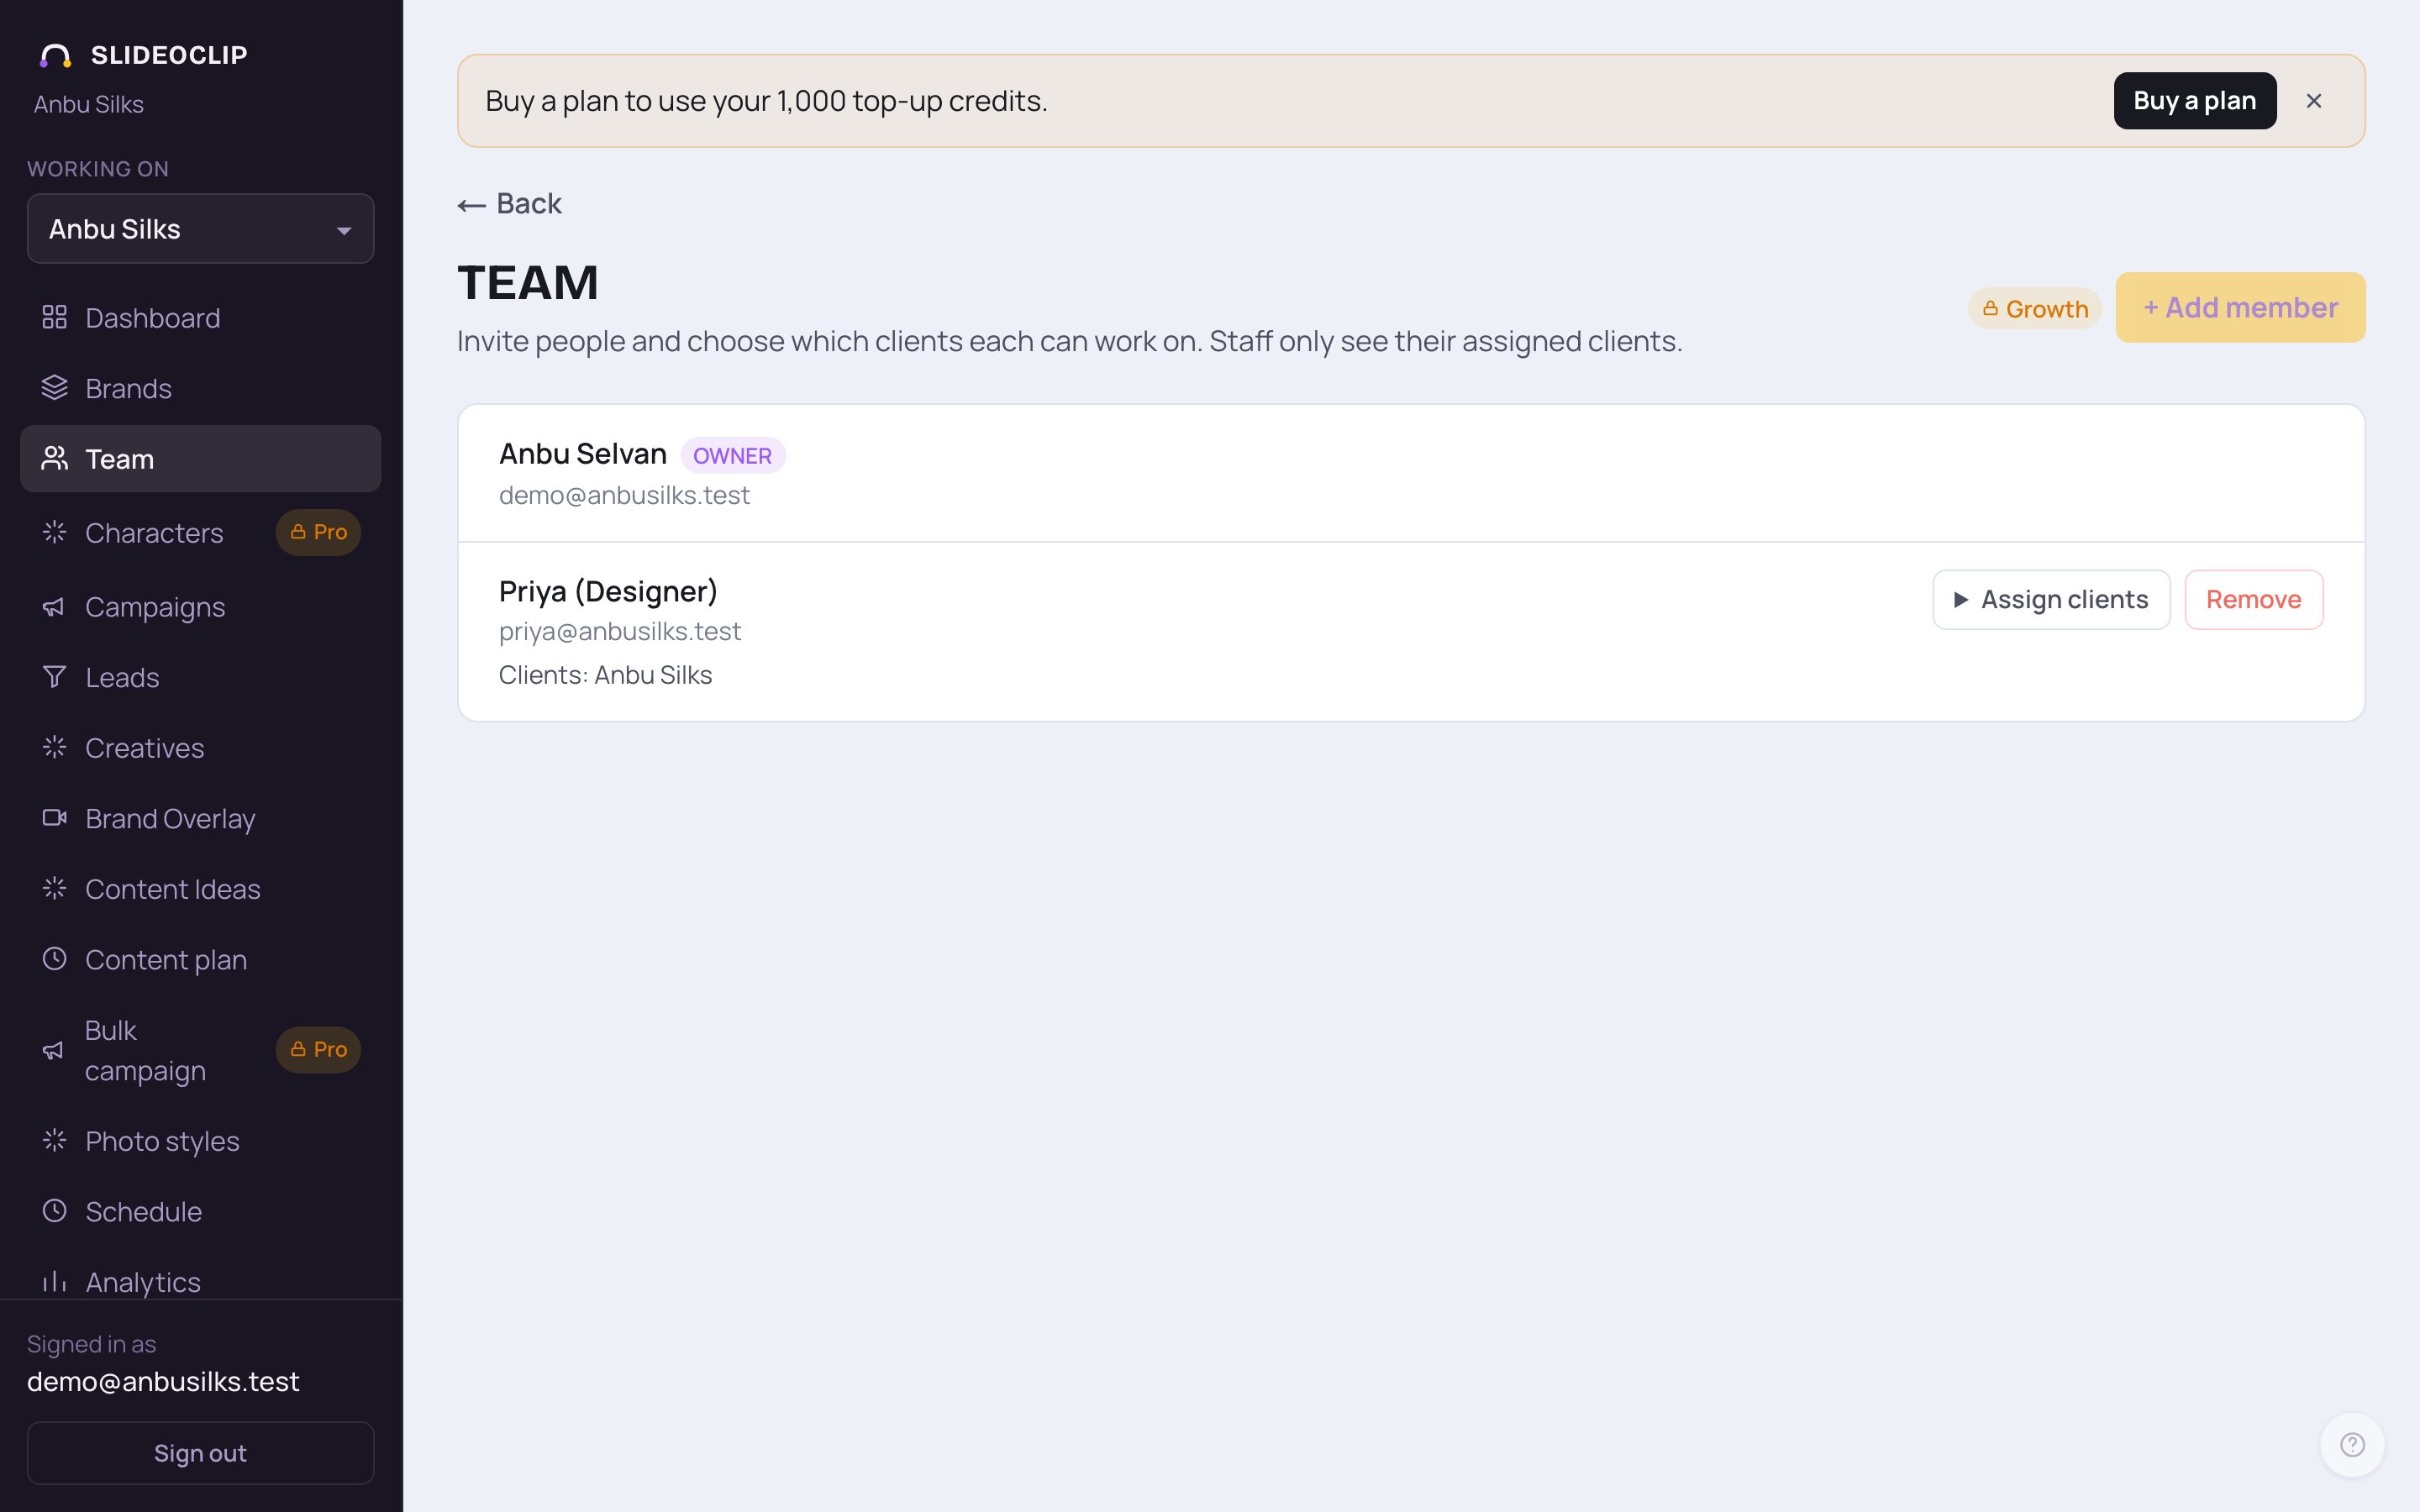
- 1Tap + Add member. When your plan is full it is greyed out and a lock with a plan name sits beside it, as in this picture. The Add a team member box opens once your plan has room.
- Type the person's Name and the Email they will log in with.
- Make up an Initial password of 8 or more characters. You share it with them, and they can change it after logging in.
- Choose the Role. Staff (limited) works only on the clients you pick. Owner (full) can do everything you can, including managing the team.
- For staff, tick the clients they may work on under Clients they can work on, for example only Smile Dental Care. Leave everything unticked to give them all clients.
- Tap Add member. A green message says they were added. Now send them their email and password. Cancel closes the box without adding anyone.
💡 If the person already has a SlideoClip account with that email, they are simply added to your workspace and keep their own password.
3. Change which clients someone sees
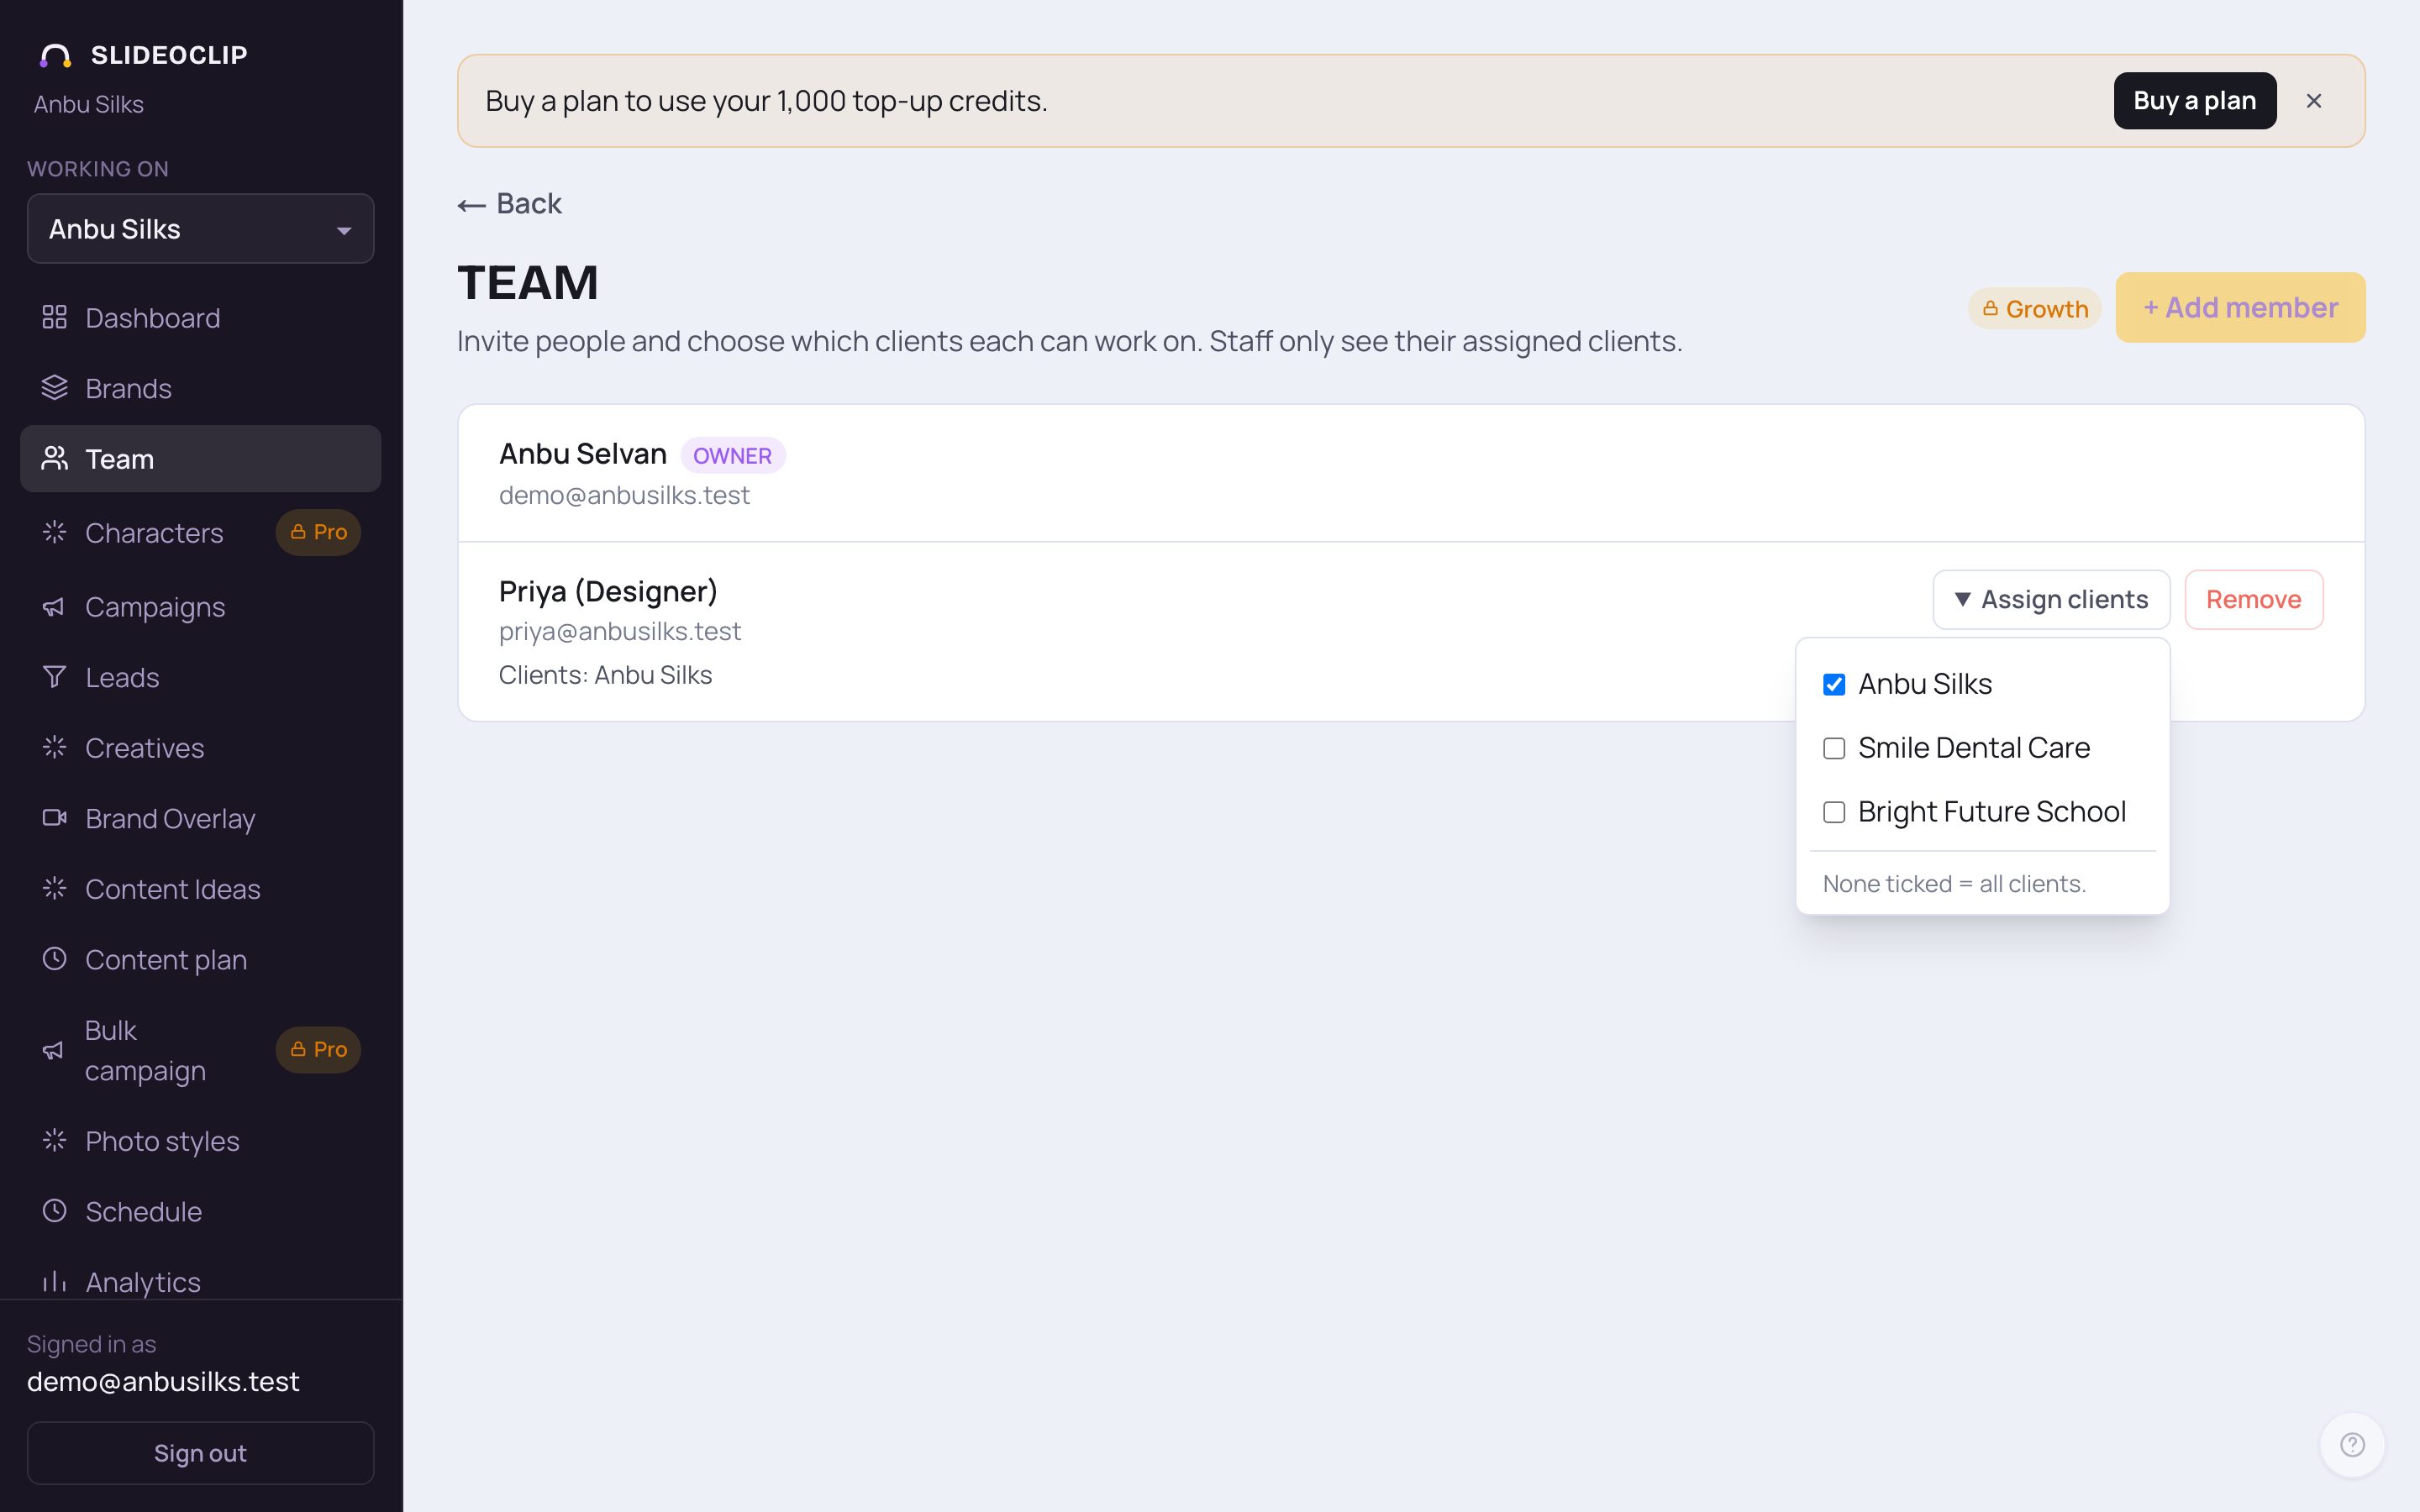
- 1Next to a staff member, tap Assign clients. A list of your clients opens. Tick or untick a client: it saves straight away, and the Clients: line updates.
- 2With nothing ticked, they can work on all clients. Tap Assign clients again to close the list.
- 3Remove takes the person out of your workspace after you confirm. Their SlideoClip login isn't deleted; they just can't open your workspace any more.
💡 Staff only see the clients you give them, and their posts only go to those clients' own pages.
4. Approve your team's posts before they go out
Want to check everything before it reaches a client's page? Turn on approvals. Then anything a staff member posts or schedules waits for your OK. This is on the Schedule page.
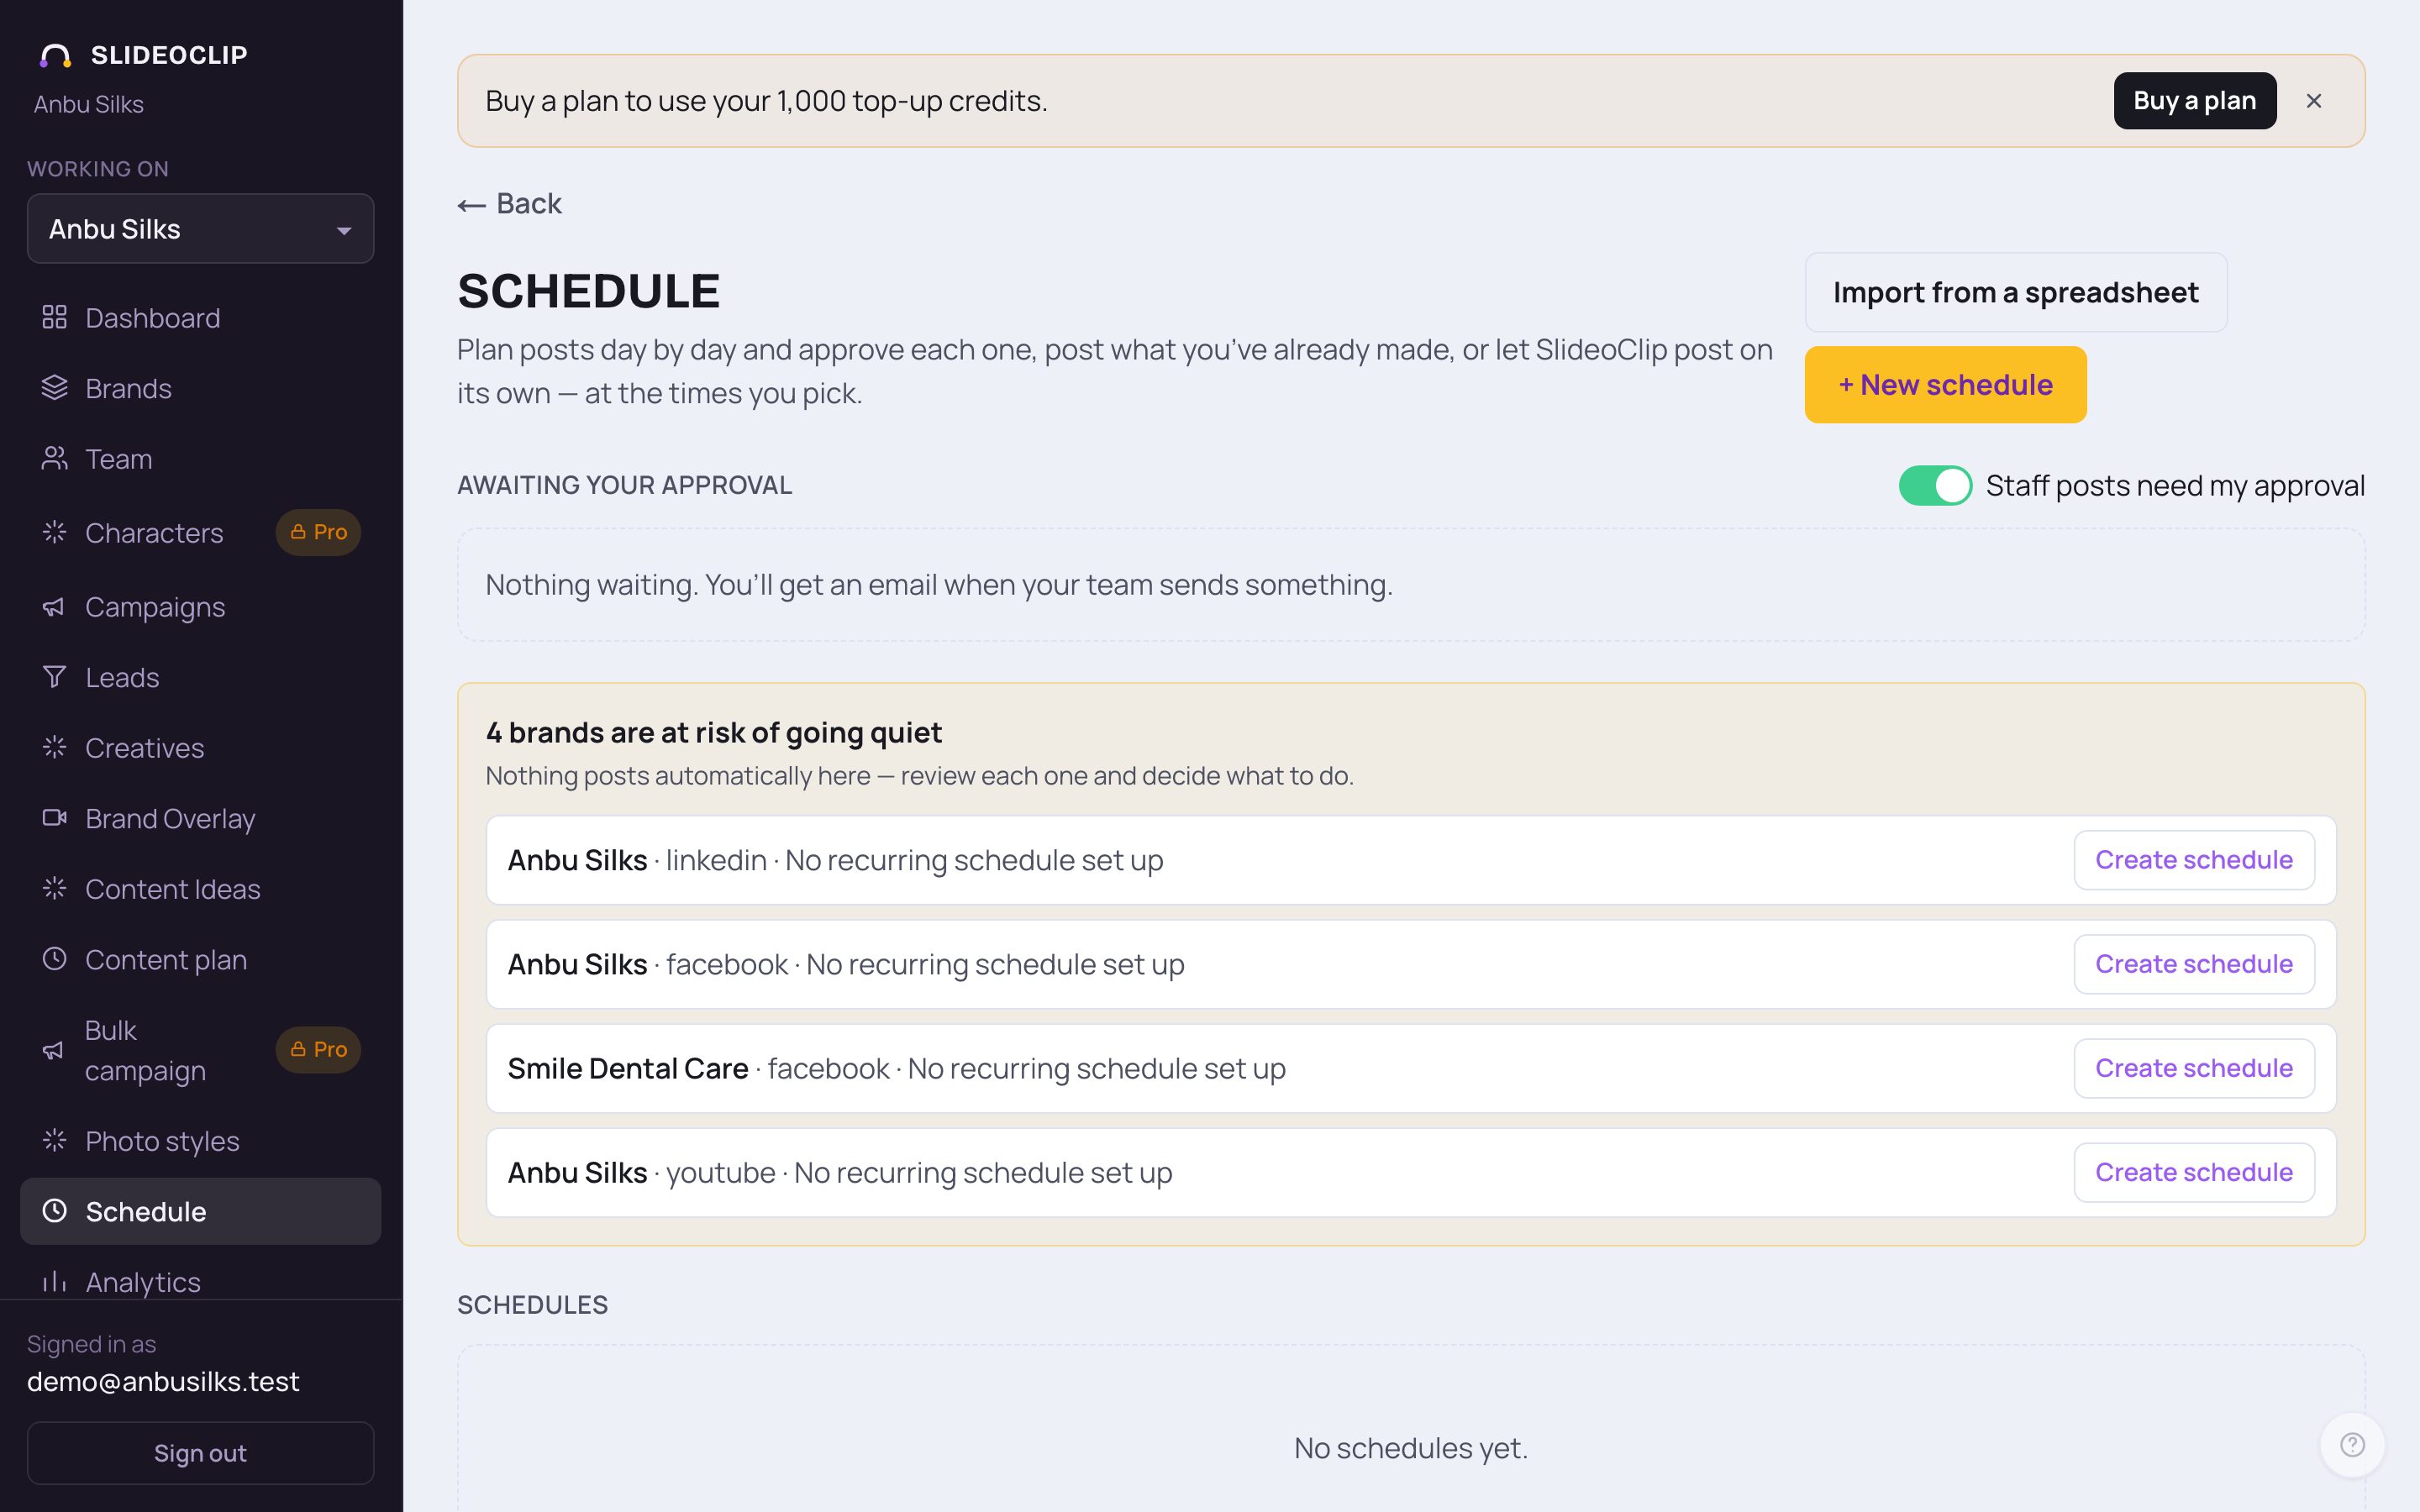
- 1Open Schedule in the menu. When posts are waiting for you, a small number shows next to Schedule.
- 2Awaiting your approval lists every staff post waiting for a decision: the creation, where and when it will go, the client, and who sent it.
- 3Turn on Staff posts need my approval. It is green when on. From then on you get an email each time your team sends something.
💡 This only affects staff. Posts made by an owner go out as normal.
5. Approve or reject
When posts are waiting, each one in Awaiting your approval has two buttons. The picture can't show this because it depends on your team's real posts, so here it is in words.

- 1Look over each post in Awaiting your approval.
- Tap Approve and the post goes out at its time. If its time has already passed, it goes out as soon as you approve.
- Tap Reject and it never goes out. Your staff member sees Not approved with your note.
- Many at once: tick Select all (or tick some), type an optional note such as "fix the price", then tap Approve or Reject.
💡 Your staff member gets an email with your decision and your note.
Good to know
- Give each person their own login instead of sharing yours. You can then limit them to their clients and remove them any time.
- If you also send clients an approval link, a post needs both: your OK and the client's.
- Staff see their own waiting posts on Schedule under Your posts waiting for approval, and what you decided.
Questions
How many people can I add?
It depends on your plan; you count as one. At the time of writing: Starter 1 (just you), Growth 3, Pro 10, and Agency unlimited. Billing, under What your plan unlocks, shows your number.
Do I pay extra for each team member?
No. There is no per-seat charge on top of your plan. Credits are shared by the whole workspace.
Can staff see all my clients?
Only if you leave Clients they can work on unticked. Tick only the clients they should see.
Can a staff member add other people?
No. Only owners can manage the team. If you want someone else to have full control, add them with the role Owner (full).
My team member forgot their password.
They can tap Forgot password? on the login page and get a reset link by email.
What are client approval links?
A separate feature on Pro and Agency: your client gets a link, with no login needed, and nothing goes to their page until they approve.